Press "Enter" to skip to content

Posts tagged as “Home”

How a Professional Duct Cleaning System Can Transform Your Home’s Air Quality

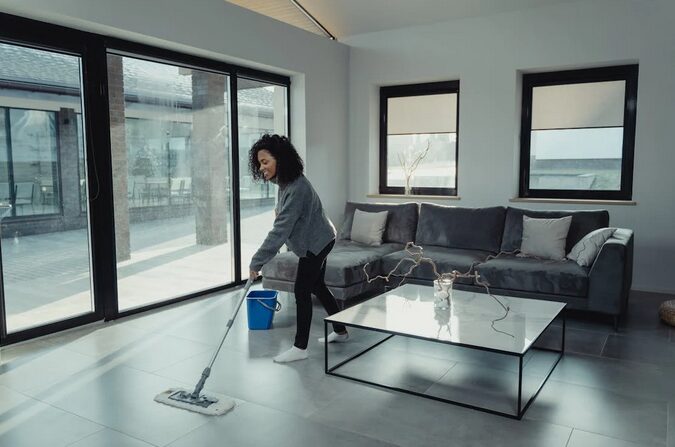
Ever walked into your home and thought, “Why does the air feel a little off?” You’re not alone. Many homeowners don’t realize that the culprit behind stale, dusty air might be hiding right in their ductwork. Dirty air ducts can quietly impact your home’s air quality and energy efficiency without you even knowing it. But here’s the good news: with a professional duct cleaning system, you can turn things around fast. Let’s break down how these systems work, why they matter, and what kind of difference they can make in your home.

The Essential Tools Get the Job Done

When it comes to cleaning your air ducts, not all tools are created equal. Professional-grade systems use heavy-duty gear that’s miles ahead of your regular vacuum or duster. Think high-powered vacuums, rotating brushes, air whips, and even video inspection tools to see deep inside the ductwork. These aren’t over-the-counter gadgets—they’re serious machines built to clear out years of grime and allergens. If you’re curious to see what this equipment looks like or want to learn more about the best tools in the industry, check out air duct cleaning equipment – www.proaireq.com. They’ve got everything you need to get familiar with what professionals use and why it works so well.

Why Clean Air Ducts Are a Game-Changer for Your Health

ceilingYou might not think about your air ducts daily, but you breathe what flows through them constantly. When those ducts are filled with dust, pollen, pet dander, or even mold spores, that stuff gets circulated all over your house. Clean ducts can seriously improve indoor air quality, especially for people with asthma or allergies. You might notice less sneezing, fewer headaches, and a general improvement in how your home feels to breathe in. Cleaner air means healthier living—simple as that.

Your HVAC System Works Smarter, Not Harder

Dirty ducts don’t just mess with your air—they make your HVAC system work overtime. When airflow is restricted by dust and debris, your system has to push harder to keep your home comfortable. That leads to higher energy bills and extra wear and tear on your unit. After a proper duct cleaning, you’ll likely notice your system running more efficiently and your utility bills dropping just a bit. It’s a win-win: better air quality and improved performance.

What Happens During a Professional Duct Cleaning?

The process starts with an inspection—either with a camera or a simple check to see how much buildup you’re dealing with. Then, technicians hook up powerful vacuums to your ductwork and use tools like rotating brushes and compressed air to dislodge all that junk. Everything gets sucked into a sealed container, so there’s no mess left behind. The whole job can take a couple of hours depending on your home size, but the results are noticeable right away.

How Often Should You Clean Your Ducts?

professional cleaning

There’s no exact science here, but most experts recommend a cleaning every 3–5 years. If you’ve got pets, or allergies, or have done recent renovations, you might want to do it sooner. Keeping your air ducts on a schedule helps prevent build-up from getting too extreme and keeps your HVAC system running like it should.

Tips for Choosing the Right Professionals for the Job

Not all duct cleaning services are created equal. Look for companies that use modern equipment, have solid reviews, and are transparent about their process. Ask questions. Do they inspect before and after? Do they seal off the system while they clean? You want a team that treats your home like their own—professional, thorough, and efficient.

Breathing cleaner air doesn’t have to be complicated. With a professional duct cleaning system, you’re not just removing dust—you’re boosting your home’s air quality, improving your HVAC performance, and creating a healthier space for your family. So, if your vents haven’t had a good scrub in a while, now’s the time to consider it. Your lungs—and your energy bill—will thank you.

Important Tips for Maintaining Your Epoxy Floors

Epoxy floors are not just a trendy choice for both residential and commercial spaces; they also offer durability and style that can elevate any area. However, like any flooring option, they require proper care to maintain their pristine appearance. Whether you’ve recently installed epoxy floors or still plan to, understanding how to keep them in top condition is essential. Note that Epoxy Flooring is one of the most popular options for homeowners, especially in and around Melbourne. If you want to find the leading experts for it, just keep on reading. With the right maintenance routine, your epoxy floors can shine brilliantly while standing up to daily wear and tear. Let’s dive into some important tips that will help you preserve the beauty of your flooring investment.

Avoid Harsh Chemicals

When it comes to maintaining epoxy floors, being cautious with cleaning products is essential. Harsh chemicals can damage the surface and compromise its durability. Many everyday cleaners contain acids or strong solvents that might seem effective but can lead to discoloration or dullness over time. Instead, opt for pH-balanced solutions specifically designed for epoxy surfaces. Always check labels before using any product. Even some seemingly harmless items like vinegar can be too aggressive for your floor’s finish. If you’re unsure about a cleaner, do a patch test in an inconspicuous area first.

Regular Cleaning

cleaning

Regular cleaning is the cornerstone of maintaining your epoxy floors. Dust and dirt can accumulate quickly, dulling their shine over time. A simple sweeping or vacuuming routine can go a long way in keeping them looking fresh. For deeper cleaning, use a damp mop with warm water. This method effectively lifts grime without harming the epoxy surface. Avoid using excessive water, as it might seep into seams if they exist. Establish a consistent schedule for cleaning based on foot traffic and usage. High-traffic areas may need more frequent attention than those less used.

Inspect for Damage

Regularly inspecting your epoxy floors is crucial to their longevity. It’s easy to overlook minor issues, but small problems can escalate if left unattended. Start by looking for cracks or chips. Even a tiny imperfection can compromise the surface over time. If you spot any damage, it’s best to address it promptly. Check for discoloration as well. Fading or yellowing may indicate that your floor has sustained UV damage or improper maintenance practices. Don’t forget to examine the edges and corners, too.

Address Spills Promptly

stain

Spills can happen anytime, whether it’s a dropped drink or an accidental overflow. When they do occur, the key is to act quickly. Epoxy floors are known for their durability, but letting spills sit can lead to staining or damage. Use a soft cloth or paper towel to blot up the liquid immediately. Avoid rubbing; this could spread the spill further and create more of a mess. For sticky substances, gentle scraping may be necessary. After soaking up most of the spill, clean the area with mild soap and water. This helps remove any residue that could cause slipping hazards later on.

Avoid Dragging Heavy Objects

Dragging heavy objects across epoxy floors can lead to unsightly scratches and damage. While it might seem convenient, this practice can compromise the integrity of your flooring. Instead, lift items when moving them. This simple habit will help maintain the smooth surface of your floor and extend its life significantly. It’s worth investing a bit more time in lifting rather than risking costly repairs later on. If you need to move bulky furniture or appliances regularly, consider using furniture sliders or dollies. These tools are designed to ease transportation without harming your flooring.

Maintaining your epoxy floors is essential for their longevity and appearance. Regular cleaning keeps them looking fresh, while avoiding harsh chemicals prevents damage over time. Promptly addressing spills ensures that stains don’t become permanent fixtures. Regular inspections help you catch any potential issues before they worsen. Additionally, being cautious with heavy objects can protect your floor from scratches and dents. By following these tips, you can enjoy the beauty of your epoxy flooring for years to come, keeping it as stunning as the day it was installed.

Why Every Home Needs Air Duct Cleaning

Air ducts play a crucial role in maintaining the air quality and comfort of our homes. Yet, they often go unnoticed until problems arise. Over time, dust, allergens, and other debris accumulate within these hidden passages, affecting both your indoor air quality and your HVAC system’s efficiency. Regular cleaning using professional Duct Cleaning Equipment can make a world of difference not just for your health but also for your wallet. Imagine breathing in fresher air while enjoying lower energy bills; that’s what effective air duct cleaning can do for you.

Benefits of Regular Air Duct Cleaning

Regular air duct cleaning offers numerous benefits that enhance your home environment. Dust, allergens, and pollutants accumulate in ducts over time. Cleaning them helps eliminate these irritants. Another key benefit is increased energy efficiency. When air ducts are clogged with debris, your heating and cooling systems have to work harder. This can lead to higher energy bills and unnecessary wear on equipment.

Signs That Your Air Ducts Need Cleaning

Dust accumulation is a common sign your air ducts need attention. If you notice dust settling on surfaces soon after cleaning, it’s time to investigate. Unpleasant odors wafting through the vents can indicate mold or mildew growth within the ductwork. This not only affects air quality but may also pose health risks. Increased allergy symptoms among household members might suggest that allergens are circulating from dirty ducts. Pay close attention if sneezing and coughing become more frequent indoors.

DIY vs Professional Air Duct Cleaning

pro cleaner

DIY methods can be tempting. After all, who doesn’t want to save some money? With basic tools and motivation, you might think you can handle it. However, consider the level of dirt and debris hiding in those ducts. A thorough cleaning requires specialized equipment that most people simply don’t have at home. Professionals use powerful vacuums and brushes designed specifically for this purpose.

Tools Used for Air Duct Cleaning

Air duct cleaning requires specific tools to ensure a thorough job. One of the most common tools is a powerful vacuum system. This helps remove dust and debris that accumulate over time, ensuring cleaner air circulation. Rotary brushes are another essential tool used in this process. These brushes can scrub the interior surfaces of ducts effectively, dislodging stubborn particles stuck on walls. Professionals also utilize high-pressure air whips. They blow away dirt and dust from hard-to-reach areas, making sure nothing is left behind.

Tips on Maintaining Clean Air Ducts

Keeping your air ducts clean doesn’t have to be a chore. Start with regular filter checks. Change them every few months or more frequently if you have pets. Consider investing in high-quality filters that can trap dust and allergens effectively. This will reduce the buildup of debris in your ducts. Another helpful tip is to schedule annual inspections with professionals. They can spot potential issues before they become major problems.

Maintaining clean air ducts is essential for a healthy home environment. This can lead to lower energy bills and extend the lifespan of your heating and cooling systems. Understanding when your air ducts need attention is crucial. Keep an eye out for signs like excessive dust buildup, unusual odors, or visible mold growth. These indicators often suggest it’s time to schedule a cleaning.

How to Save Money on Home Restoration Projects

Home restoration projects can be significant investments due to damage, wear, and tear, or aesthetic upgrades. While these projects are essential for maintaining the value and comfort of your home, they can also strain your budget if not managed wisely. This blog post shares practical pointers to help you achieve cost-effective home restoration while achieving your desired outcomes.

Prioritize Projects

Determine which restoration projects are the most critical and prioritize them according to urgency and impact. Addressing high-priority projects first will prevent further damage and save you money in the long run.

DIY When Possible

DIY paint

Consider tackling smaller restoration tasks yourself if you have the necessary skills and tools. DIY projects can significantly reduce labor costs, especially for painting, minor repairs, and basic landscaping.

Have Multiple Quotes

When seeking professional services, such as contractors or restoration specialists, obtain quotes from multiple sources. Comparing quotes will give you a better understanding of the average cost and help you negotiate better deals.

Reuse and Repurpose

Before discarding materials, fixtures, or furnishings, explore opportunities to reuse or repurpose them in restoration projects. Refinishing furniture, repainting cabinets, or salvaging architectural elements can lower expenses and add character to your home.

Consider Alternative Materials

Research alternative materials that offer similar aesthetics and functionality at a lower cost. For example, consider laminate flooring instead of hardwood or porcelain tile instead of natural stone.

Shop Smart for Materials

Take advantage of sales, discounts, and clearance items when purchasing materials for your restoration projects. Buying in bulk or during seasonal promotions can significantly reduce your overall expenses.

Negotiate With Contractors

engineersNegotiate pricing and terms with contractors, and be upfront about your budget constraints. Some contractors may be willing to adjust their pricing or offer cost-saving suggestions to accommodate your budget.

Plan Ahead

Planning can help you avoid last-minute decisions that may lead to unnecessary expenses. Proper planning allows you to research options, find the best deals, and make informed choices.

Handle DIY Demolition and Cleanup

For larger projects, consider handling demolition and cleanup tasks yourself. This can save you money on labor costs and provide a sense of accomplishment as you contribute to the project’s progress.

Home restoration projects are essential to homeownership but don’t have to break the bank. You can achieve cost-effective home restoration without compromising quality by setting a budget, prioritizing projects, considering DIY options, obtaining multiple quotes, and shopping smart for materials. The key is to be proactive, resourceful, and open to creative solutions that help you save money while achieving your desired outcomes.

Tips When Updating Plumbing in an Old House

If you are like most people, you probably have an old house that needs some updating. And, if you’re like most people, updating the plumbing is probably at the top of your list. Updating your plumbing can be a daunting task, but it doesn’t have to be. In this blog post, we will give you some tips on how to update your plumbing in an old house without breaking the bank.

Hire a Professional

wrenchesThis is probably the most important tip on this list. Hiring a professional plumber can save you time, money, and headaches in the long run. If you doubt whether or not you should hire a professional, just remember that they have the experience and the know-how to get the job done right. If you are not knowledgeable and experienced in plumbing, you should not attempt to do it yourself. If someone can recommend you a professional, that would be ideal.

Create a Plan

Before you start tearing out walls and ripping up floors, you need to have a plan. You need to know what you want to accomplish and how you are going to accomplish it. Having a plan will save you time and money in the long run. If you don’t, you will end up like many people who start a project without a plan and end up with a half-finished mess. This has led them to spend more money, in the long run, to finish the project because they have to start over.

Update One Room at a Time

tapTrying to update your entire house at once can be overwhelming, and it will probably cost you more money in the long run. Instead, focus on one room at a time. This will help you stay organized and on budget. This is very important because if you try to do too much at once, you will end up with a half-finished project and a lot of unused materials. This has happened to many people, and it is not a pleasant experience. This is why we recommend you take it one room at a time.

Updating your plumbing is a big job that can seem daunting, but by following these tips, you can make the process go as smoothly as possible. Whether you’re replacing rusty old pipes or just installing a new sink, be sure to take your time and plan ahead. If you have any questions about the process, don’t hesitate to ask a professional for help. With some preparation and careful work, you can update your plumbing and breathe new life into your old house.

Simple Tips to Move Into Your First Apartment as a Couple

Moving into your first apartment as a couple can be a daunting task. There is a lot to do between finding the right place, packing up all your belongings, and getting everything set up in your new home. You might think the Montessori twin bed is a good idea, but the Montessori full bed is way better. What else? Don’t worry; we’ll show you how to make your life easier. This blog post will provide some simple tips that will make moving into your first apartment as a couple much easier. Follow these tips, and you will be settled into your new home in no time.

Determine Whose Stuff Goes Into a New Place

discussionWhen moving into a new place as a couple, be sure both of you determine whose stuff is going into the new place and whose isn’t. It can be difficult, especially if you have been living together for a while and have accumulated a lot of stuff. The best way to handle this is to sit down together and make a list of who will bring what. Once you have made your lists, pack up and label all your belongings accordingly. This will make unpacking and setting up your new place much more manageable.

Make Decorating a Team Effort

As it’s going to be your first home as a couple, your apartment should be a reflection of both of your styles. When decorating your new home, ensure you include both of your tastes in the design. This doesn’t mean that everything needs to be perfectly matched, but both of you should feel like the space is yours. Discuss what style you are going for and how each of you can contribute to your new home’s overall look and feel.

Set Things Clear About Your Tolerance for Clutter

If you and your partner have different tolerance levels for clutter, setting things clear from the start is vital. Discuss how you would like to keep things organized and tidy in your new home and come up with a system that works for both of you. It might mean that one person is responsible for tasks such as taking out the trash or doing the dishes. Meanwhile, the other person is responsible for different tasks, such as vacuuming or dusting. Whatever system you come up with, communicate and stick to it.

Talk About the Lighting Preferences

lightingYou may think that as a freelancer, you want your bedroom light and airy. But what if your partner is a night owl who likes to sleep in complete darkness? It’s important to talk about your lighting preferences before moving into your new home to ensure both of you are comfortable. Discuss things like window treatments, overhead lighting, and lamps so you can be on the same page about how you want your new home to be lit.

Moving into your first apartment as a couple can be a daunting task. But if you follow these simple tips, you will be settled into your new home in no time. By determining whose stuff goes into the new place, making decorating a team effort, setting things clear about your tolerance for clutter, and talking about your lighting preferences, you and your partner will be able to move into your new home with ease.

How to Choose a Real Estate Agent for Selling Your Home

Selling your home or buying a new home is a tedious experience and needs you to put together several factors. However, it can be an exciting deal if you hire the right realtor who understands the tricks and skills of the market. With so many brokers and real estate agents in the market today, it can be difficult to find the right agent that understands your needs. If you hire a trustworthy agent with enough experience in their job,they will help to find out what is the best time to sell a house to ensure that your property fetches the best prices in the market. Here are essential tips for choosing the right real estate agent for selling your home.

Do Your Research

laptopMost home sellers are fond of making the mistake of hiring a real estate agent that they know without researching about them. Even though your colleague gave you the contacts of a realtor, it is essential to gather enough information about them before finding them to work for you. Sparing some of your time looking for information on the realtor and what previous clients have to say about the realtor will help you make the right decision on the best realtor to sell your home.

Seek Referrals

Most people who want to sell their homes prefer to look for recommendations from close friends and relatives. Therefore, it is essential to begin your search by asking people about their experiences when dealing with a real estate agent. If you seek referrals from other home sellers, it will help save you time looking for a prospective agent to put your home on sale. Consider asking homeowners whether they would recommend any realtor in your area who deals with buying and selling homes and inquire about their charges for the professional service.

Choose a Trustworthy Agent

When finding the best realtor, it is essential to start the conversation and be keen on how the agent listens and answers your questions. It is necessary to hire a real estate expert who you respect and trust with your property and will not rip off your hard-earned money. They will market your home and find options for purchase to ensure that the process of selling is made more accessible.

Look For Passion and Honesty

Most home sellers want to work with honest agents that they can trust. Consider asking the agent to provide you with their work samples to see how they market properties. It is essential to check their listing materials such as signage, website, and brochures. It is advisable to choose a realtor who will tell you what it takes to sell your home faster.

If you find the right agent that keeps your interest in mind, they will help you find the perfect home. Successful real estate agents use modern technology to post your property on sale on their website for a potential buyer to see.